Go back one page in the scenario Go to Tutorial Home Page Go forward one page in the scenario
topic links | tutorial home | scenario home | e-mail support

Scenario: Getting Started with Intraspect
Go to Scene 1: Getting Started with Intraspect Go to Scene 2: A valuable e-mail Go to Scene 3: Collecting e-mail Go to Scene 4: Logging in to Intraspect Go to Scene 5: First look at Intraspect Go to Scene 6: E-mail collection results Go to Scene 7: Preparing for Web page collection Go to Scene 8: Collecting a Web page Go to Scene 9: Collecting an excerpt Go to Scene 10: Collecting from the file system Go to Scene 11: Re-docking the Collection Bin Go to Scene 12: Viewing collected e-mail Go to Scene 13: Viewing cover pages Go to Scene 14: Viewing Web objects Go to Scene 15: Viewing excerpts Go to Scene 16: Viewing binary documents Go to Scene 17: Viewing objects immediately Go to Scene 18: Private Workspace Go to Scene 19: Creating new folders Go to Scene 20: Collecting from the Collection Bin into folders Go to Scene 21: Changing the current context Go to Scene 22: Using the Context Selector Go to Scene 23: Making private information public Go to Scene 24: Adding comments Go to Scene 25: Setting up a discussion Go to Scene 26: Discussion e-mail addresses Go to Scene 27: Adding Intraspect recipients to a discussion Go to Scene 28: Adding non-Intraspect recipients to a discussion Go to Scene 29: Sending messages to a discussion Go to Scene 30: E-mail participation in discussions Go to Scene 31: Observing a discussion inside of Intraspect Go to Scene 32: Accessing Intraspect using a Web browser Go to Scene 33: Reply to a discussion from a browser Go to Scene 34: Find a new message in the discussion Go to Scene 35: Submitting a Search Go to Scene 36: Reviewing Search results Go to Scene 37: Displaying the contents of Search hits Go to Scene 38: End of Scenario I
19 of 38


19: Creating new folders

Create a new folder in your Private Folder to organize the objects that you have collected

Dialog prompts for title and description
  1. Choose the New Folder button on the Action Toolbar at the top of the Context Pane. Refer to the tool tip to verify that you have the correct button. The Folder Properties dialog appears.
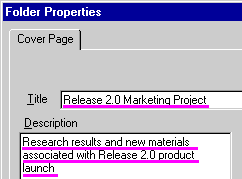
  2. Enter a title in the Title field. Compose a title that conveys the meaning or value of the object in relation to your business purpose; for example, the folder may contain documents about "Release 2.0 Marketing." Refer to Naming in Intraspect for help with creating useful folders. Refer to screen shot
  3. Enter a description for your new folder in the Description field. Refer to screen shot
  4. Choose OK.

The folder appears in the Context Pane within your Private Folder, and it is ready to receive objects that you want to place in it
previous next

Related Topics